

The YellowKey debacle
UPDATE 22nd of June 2026: The yellowkey vulnerability has been resolved in the June 2026 patch. The remediation shared in this blog post is no longer needed. Source
It’s been almost 2 months since the individual known as “Nightmare-Eclipse” (aka “Chaotic Eclipse”) released 6 zero-day exploits, and I’ve been closely monitoring the debacle as it unfolds. On one side you have a disgruntled security researcher who firmly believes Microsoft has wronged him, and on the other you have Microsoft taking a no-BS approach, saying normal protocol wasn’t followed and that making the source code for all of these exploits publicly available was ruthless and irresponsible. They even went so far as to ban the GitHub repo where all of the source code was initially hosted.
You can read more about the details here - the events are still unfolding, and I don’t think we’ve seen the last of it yet. Microsoft released a blog post 2 days ago (as of today’s date) in which they clearly distance themselves from the kerfuffle, and according to them the security researcher is 100% to blame. You can read Microsoft’s response here.
Be that as it may, what about the BitLocker exploit dubbed “Yellowkey”?
What is the YellowKey exploit
The YellowKey exploit is a BitLocker bypass attack that allows an attacker with physical access to a device to gain access to the data on a hard drive, even though it’s encrypted with BitLocker. Mechanically, it involves placing specially crafted ‘FsTx’ files on a USB drive or EFI partition, rebooting into WinRE, and triggering a shell by holding down the CTRL key. It bypasses TPM-only BitLocker in particular, and the critical constraint is physical access — it cannot be abused remotely.
So it’s not great — in fact, I’d go so far as to say it’s pretty bad. One of the main features of BitLocker is data-theft protection in case a device gets stolen.
It’s worth noting that this vulnerability only affects Windows 11 24H2 and higher. It does not affect earlier versions of Windows 11 or Windows 10 — Windows 10 is in the clear due to differences in how it configures WinRE.
Don’t forget your servers: the client side isn’t the whole story. Microsoft’s MSRC advisory lists the canonical affected products as Windows 11 24H2, 25H2 and 26H1 (x64), plus Windows Server 2025, including Server Core. Windows Server 2022 was thrown around as affected when the PoC first dropped, but it’s not in Microsoft’s official scope, so treat that as unconfirmed.
So what can we do about it?
Mitigation using Intune
Microsoft has released a PowerShell script as an interim fix that mitigates the attack until an official patch is released through normal channels. You can find it in their security update report for this incident here. The fix is relatively simple: mount the WinRE partition and remove the Autofstx.exe executable.
The PowerShell script can be deployed through Intune as a platform script, but there is no detection or logging mechanism, so if it fails you won’t know why. I recommend heading over to James Vincent’s blog post about this and grabbing his remediation scripts instead. You can find his blog post here.
Download both the detection and the remediation script.
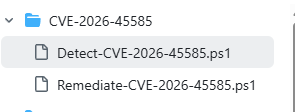
Logging: Both the detection and remediation scripts log to the IntuneManagementExtension folder under C:\ProgramData\Microsoft\IntuneManagementExtension\Logs, so you’ll have something to check if a run fails.
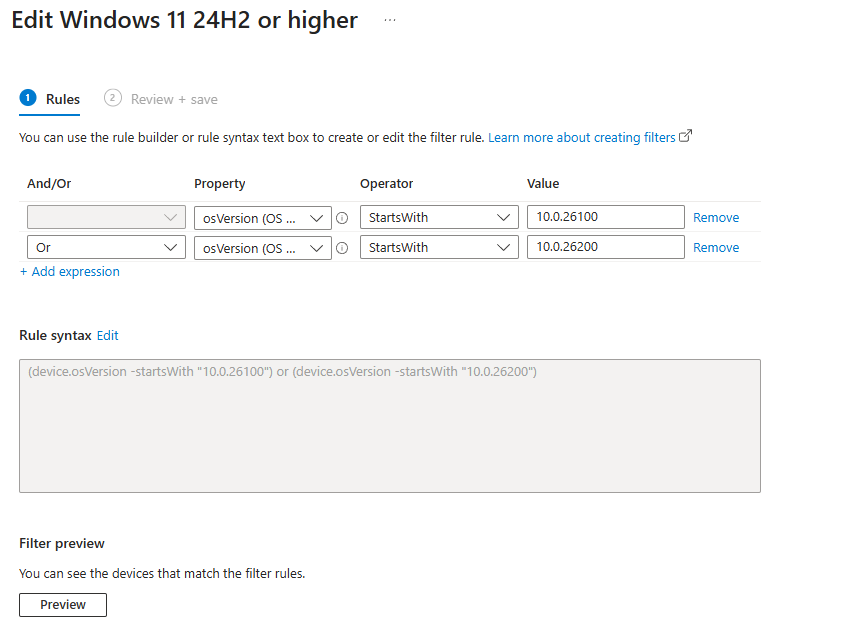
Once downloaded, I also recommend you create a new device filter in Intune so you can target devices running Windows 11 24H2 or Windows 11 25H2. In Intune, navigate to Devices > Assignment Filters and create a new filter. Set the property to “osVersion”, the operator to “starts with”, and the value to “10.0.26100”, then add an “or” rule with a second “osVersion” / “starts with” / “10.0.26200”. It should end up looking like this: (device.osVersion -startsWith "10.0.26100") or (device.osVersion -startsWith "10.0.26200")
Now head over to Intune > Scripts and Remediations and click “Create”. Give it a nice name, e.g. “YellowKey mitigation”. Then add both the detection and the remediation script. Make sure to set “Run script in 64-bit PowerShell” to “Yes”. Click Next, apply scope tags if required, then hit Next again. Now for the important bit: I recommend you assign it to a few devices to test first, before starting the broad rollout. If you are already using Autopatch, you will already have these rings — just search for “Autopatch” and you should find the corresponding Autopatch Entra groups matching your rings.
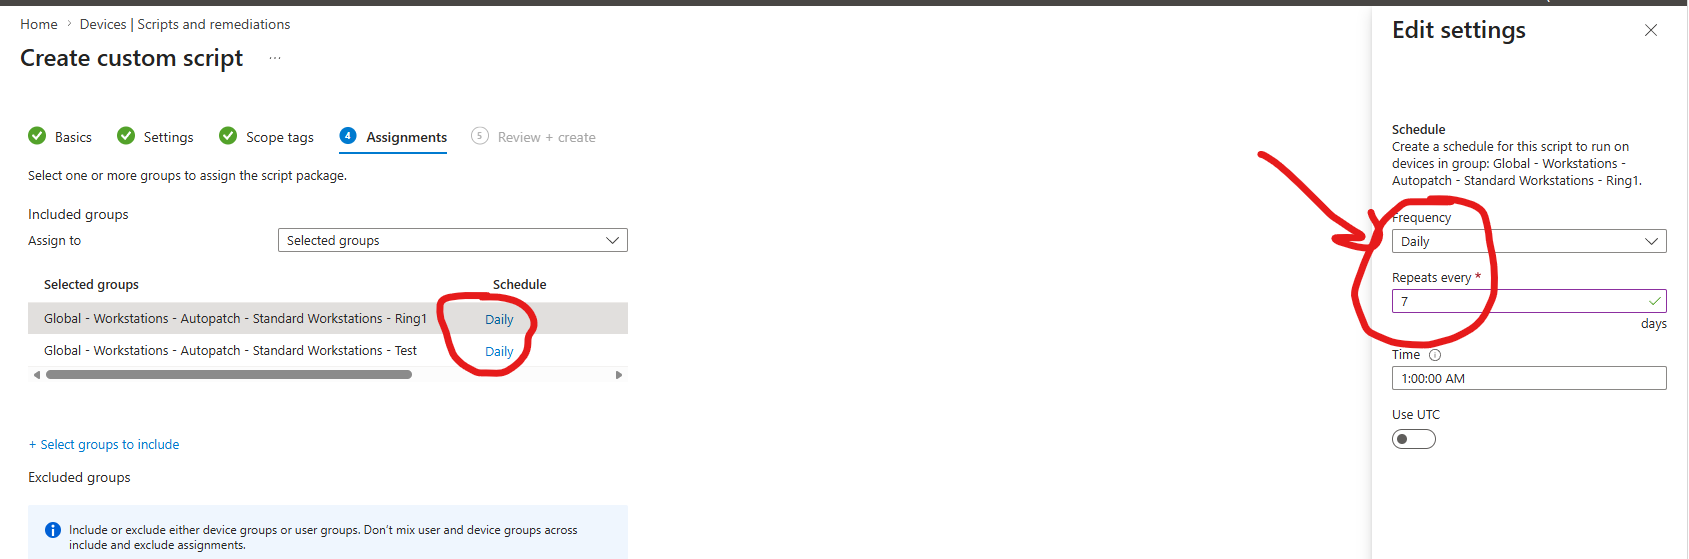
Adjust the “Schedule” so it only runs every 7 days or similar. There is no reason to have it run daily. Then make sure to apply the Windows 11 24H2 or higher filter you created earlier.
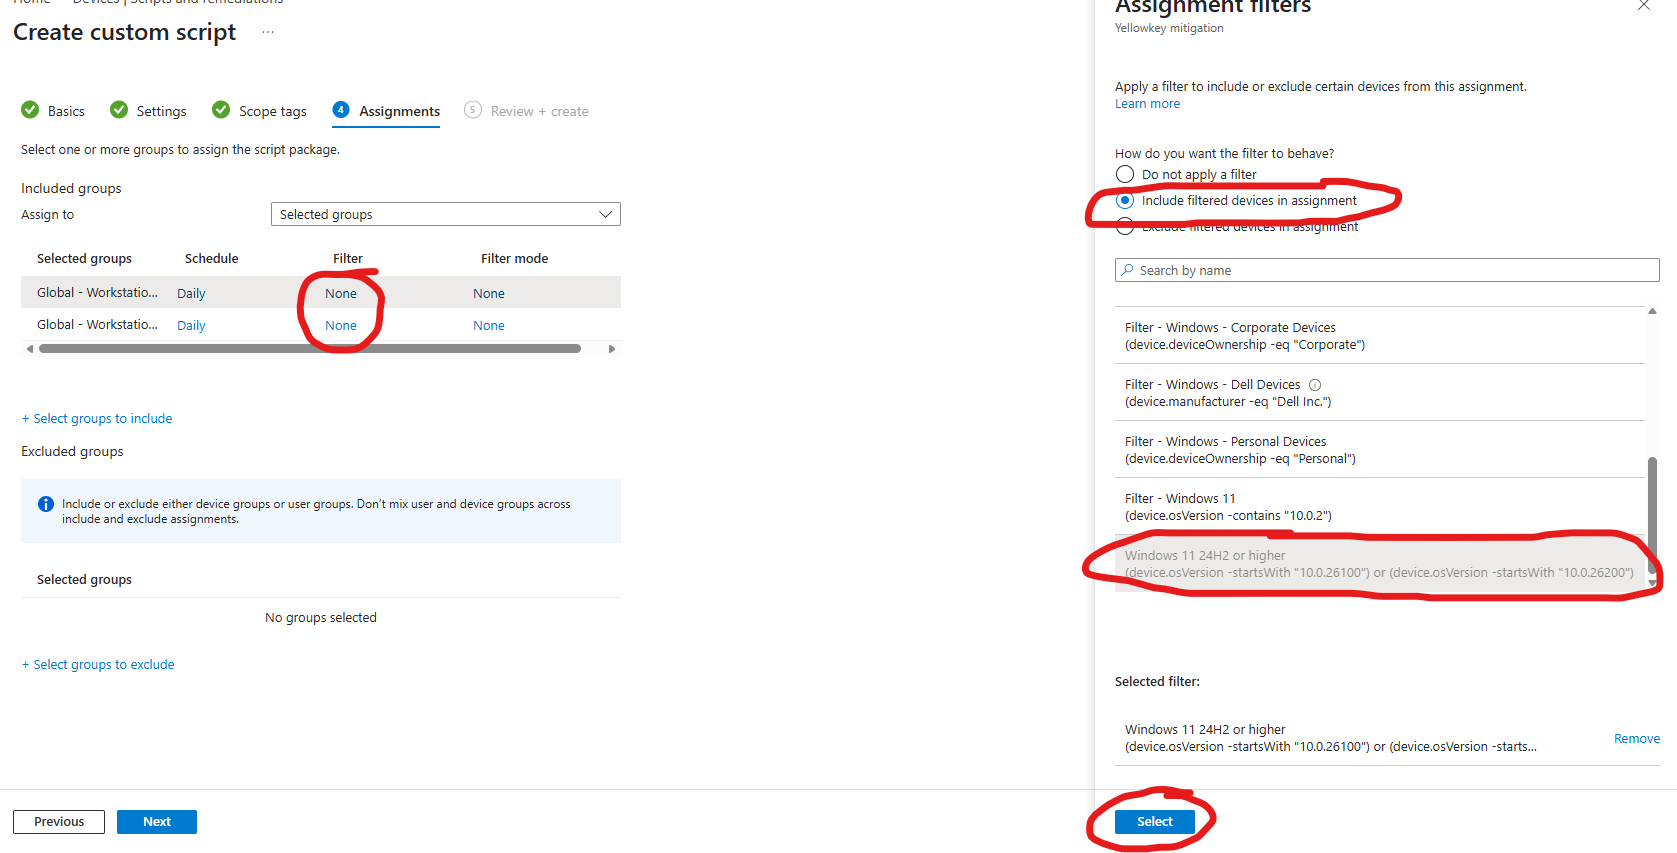
You are now ready to start deploying to a test and an early ring. Once you are happy with the results, you can gradually continue the rollout by adding your remaining rings. Alternatively, if you don’t really care about testing and just want to deploy the mitigation to everyone immediately, you can deploy to “All Devices” with the Windows 11 24H2 or higher filter.
That’s it for now
I hope you found it useful.
Remember: only deploy to Windows 11 24H2 or higher (and Server 2025), or you’ll most likely see an error when trying to remediate, such as REAGENTC.EXE: Operation failed: c142011c / REAGENTC.EXE: An error has occurred.
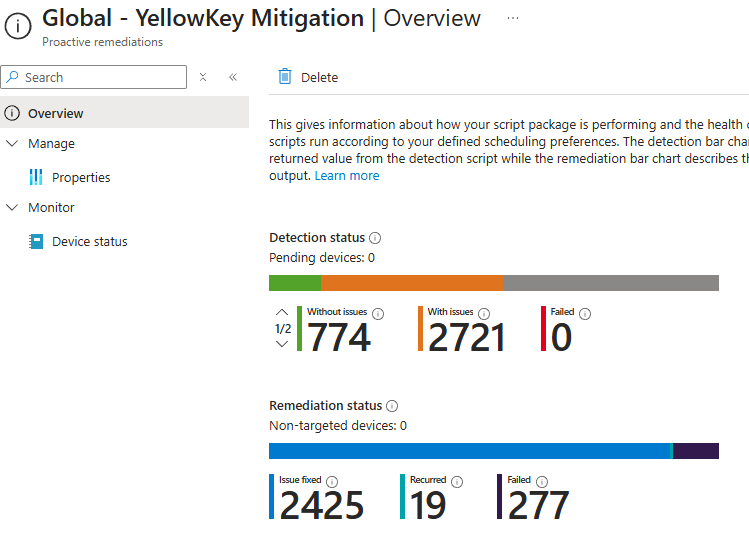
I’ve used this approach at two customers already with great results. We got a few errors in the beginning because we forgot to add the device filter, so Windows 10 and earlier versions of Windows 11 devices were targeted as well.
Have an awesome day ahead :)