Windows 11 24H2 Upgrade, Autopilot Rollout, and the Partitioning from Hell
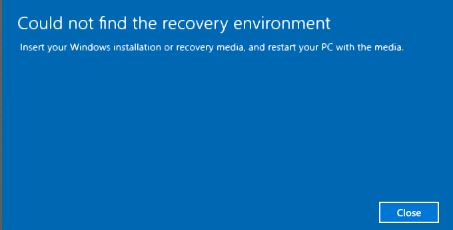
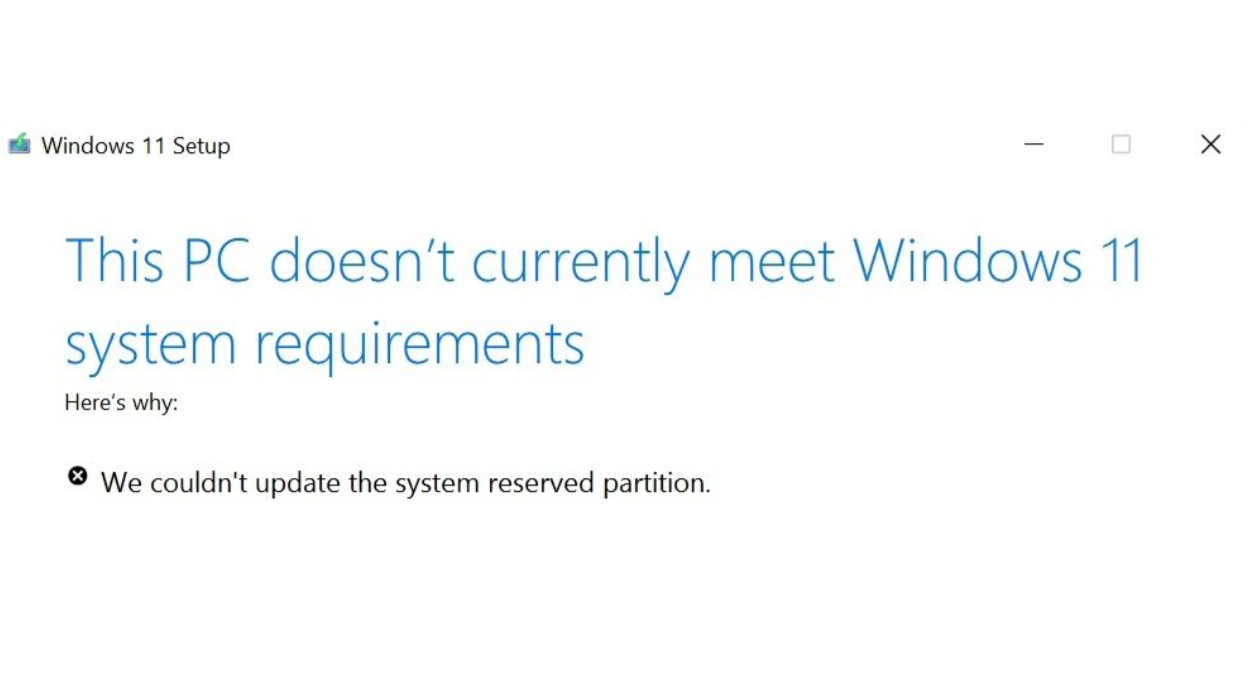
I was recently engaged with a customer whose devices were failing to upgrade to Windows 11 24H2, showing the error: “We couldn’t update the system reserved partition.” Coincidentally, they also reported that when using “wipe” on some devices via Intune, they sometimes encountered the classic error: “Could not find the recovery environment.”
Initially, I assumed the issue was just an undersized recovery partition. I’ve helped several customers over the years with this exact problem—where an ancient SCCM task sequence for OSD (Operating System Deployment) only allocates 300MB for the recovery partition, which just doesn’t cut it today. For Windows 11 24H2, the recommended size has increased again—now 1GB is advised.
But in this case, the recovery partition wasn’t the only culprit. It was the first time I’d encountered this specific issue, but the customer mentioned seeing the “We couldn’t update the system reserved partition” error before. We eventually identified the problem and implemented a fix. It was a simple solution, but definitely not a pretty one.
DISCLAIMER: Please be cautious when using the scripts mentioned in this post. Test them on a few devices first and roll them out gradually in waves/rings. These scripts were tailor-made for my customer’s environment. Your setup may differ, and using the scripts without modifications could break things.
Fixing the Recovery Partition
The recovery partition issue can be fixed in most scenarios, provided there’s enough available disk space. I created a Proactive Remediation script for this a couple of years ago. However, in this case, the customer had used CapaInstaller to shoehorn the recovery environment onto the OS partition during deployment. Surprisingly, it was reporting as “Enabled”, even though it was placed on the OS Partition.
Having the recovery environment on the OS partition is unsupported and can interfere with BitLocker and the reset/wipe functionality from Intune. The recovery environment needs its own dedicated partition.
The downside is that for production devices low on disk space, this fix could either reduce available space by 1GB or fail entirely.
I recently updated my PowerShell script to also detect when the recovery environment is enabled but resides on the OS partition. It’s available in my GitHub here.
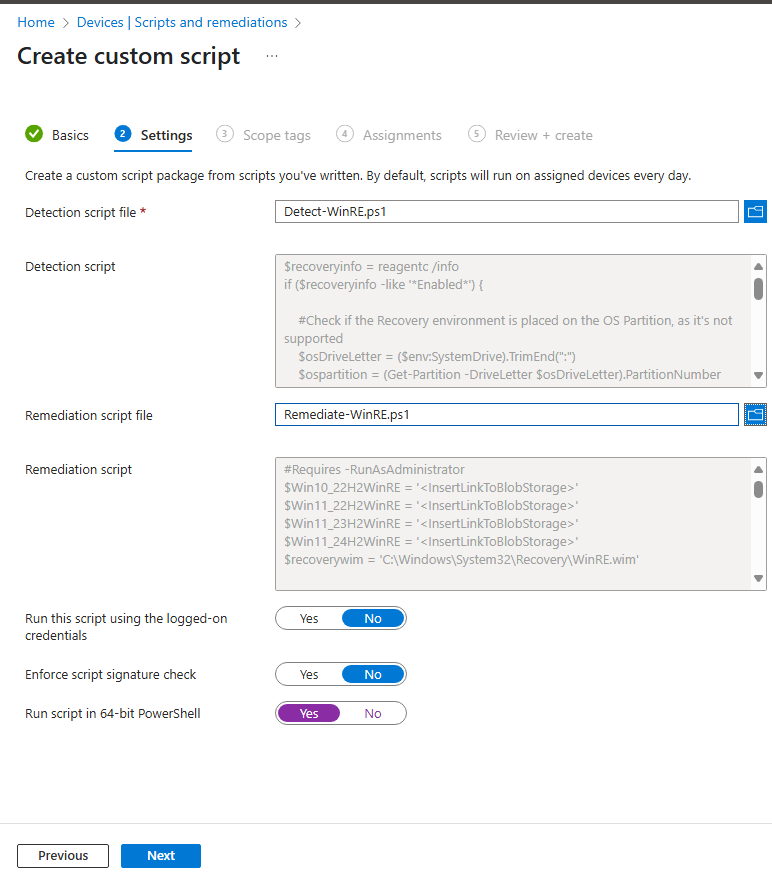
Assign it as follows:
- Run in user context: No
- Script signature check: No
- Run in 64-bit context: Yes
Frequency: I recommend running it just once or at most every 15 days. Don’t set it to hourly or daily.
Detection Script Breakdown
- Checks if the recovery environment is enabled via
reagentc /info.- If enabled and on the OS partition, it remediates and flags as “With issues.”
- If disabled entirely, it proceeds to remediate and flags as “With issues.”
- If enabled and on a separate partition, no action is taken—marked as “Without issues.”
Remediation Script Breakdown
- Searches for the recovery WIM at
C:\Windows\System32\Recovery\WinRE.wim.- If missing, you’ll need to provide it via blob storage, file share, etc.
- Adjust the script variables to point to your OS-specific
.wimfiles. You can extract these from install.wim inside Windows ISOs using 7-Zip.
- Places a DiskPart script in
C:\Windows\Logs\WinREFix.- It shrinks the OS drive by 1GB, creates a new partition labeled “WinRE”, assigns it a temporary drive letter
Q:, and sets required GPT attributes.
- It shrinks the OS drive by 1GB, creates a new partition labeled “WinRE”, assigns it a temporary drive letter
-
Creates the folder
Q:\Recovery\WindowsRE, copies overwinre.wim, and enables the recovery environment. -
Runs another DiskPart script to remove the
Q:drive letter (after a 15-second pause to prevent failure due to rapid execution). - Performs a final check to ensure WinRE is enabled.
- If not, it inspects logs for two specific failure conditions and schedules a chkdsk if needed (this only works on English base language systems—adjust accordingly).
This final troubleshooting step was added for a customer with over 10,000 devices. After the fix, a few hundred stubborn ones remained. chkdsk helped in some cases; others required freeing disk space manually or, if disk corruption was present, a full reinstall or replacement.
NOTE: Make sure your OSD tooling (MDT, SCCM, etc.) creates the correct partitioning scheme—1GB for the recovery environment is recommended.
Fixing the EFI System Partition (ESP)
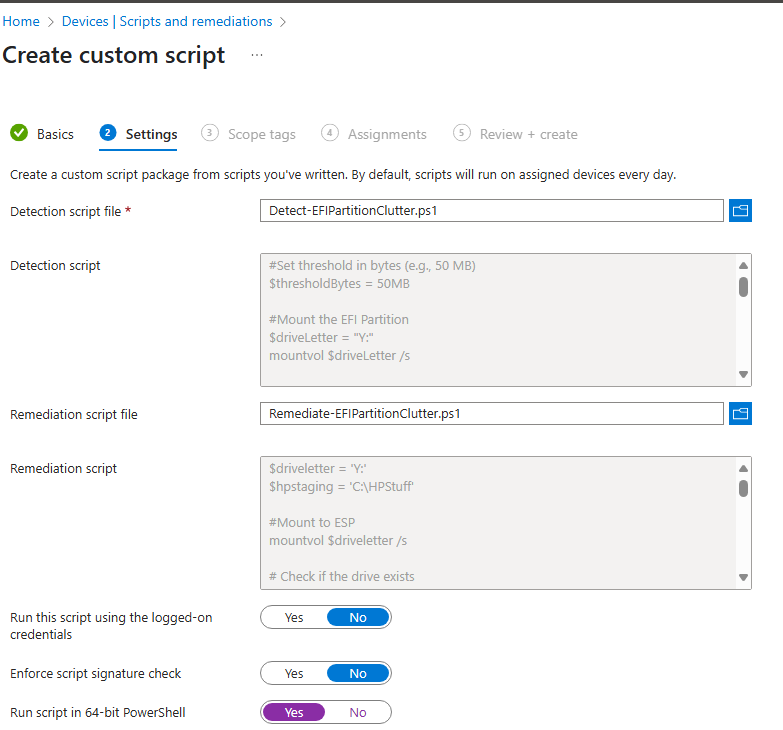
Fixing the ESP involves mounting it, freeing up space, then unmounting. I couldn’t find official Microsoft documentation on how much space Windows 11 24H2 requires, but 50MB seems to be the minimum. AI tools like Copilot and ChatGPT suggest 250MB, but they cite community sources like answers.microsoft.com and superuser.com.
You can find the script here.
Assign it as follows:
- Run in user context: No
- Script signature check: No
- Run in 64-bit context: Yes
Frequency: Run once or at most every 15 days.
OEMs like HP, Lenovo, and Dell sometimes store BIOS/firmware files in the ESP for capsule updates, but cleanup is inconsistent.
Detection Script Breakdown
- Mounts the ESP to
Y:usingmountvol Y: /s. (adjust ifY:is already used). - Checks disk space (threshold set to 50MB on line 6).
- If space is below threshold, flags for remediation.
- Dismounts
Y:.
Remediation Script Breakdown
- Mounts ESP to
Y:(adjust ifY:is already used). - Logs free space before taking action.
- Moves files from:
Y:\EFI\HP\DEVFWY:\EFI\HP\Previous
toC:\HPStaging, if found.
- Deletes any
.ttffont files in the ESP. - Logs space after cleanup.
- Dismounts
Y:.
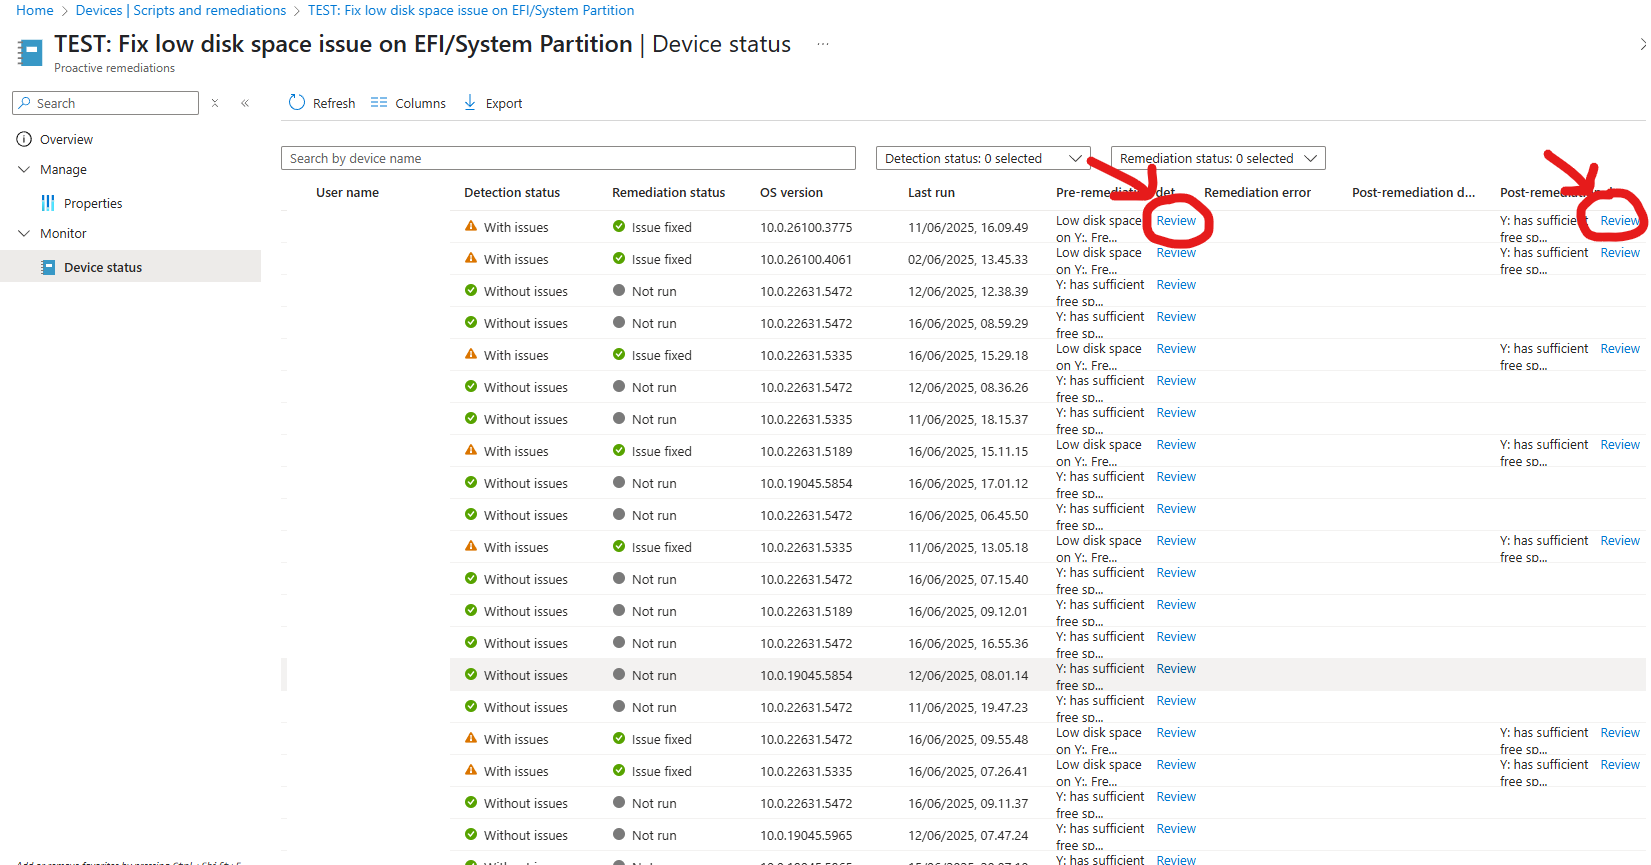
You can view before/after disk space in the Remediation → Device Status overview. Just enable the appropriate columns and click “Review.” Otherwise if you are using Lenovo devices and you see this issue, you can easily expand the script to look for the relevant folders. I only saw this issue at 1 customer who has HP devices, so I know exactly which folders to look for.

NOTE: As with the recovery partition, ensure your OSD tooling creates an appropriately sized ESP. Recommendations vary, but 300MB is the bare minimum. For future-proofing (and to avoid OEM BIOS update issues), aim for around 1GB if possible.
Rounding Up
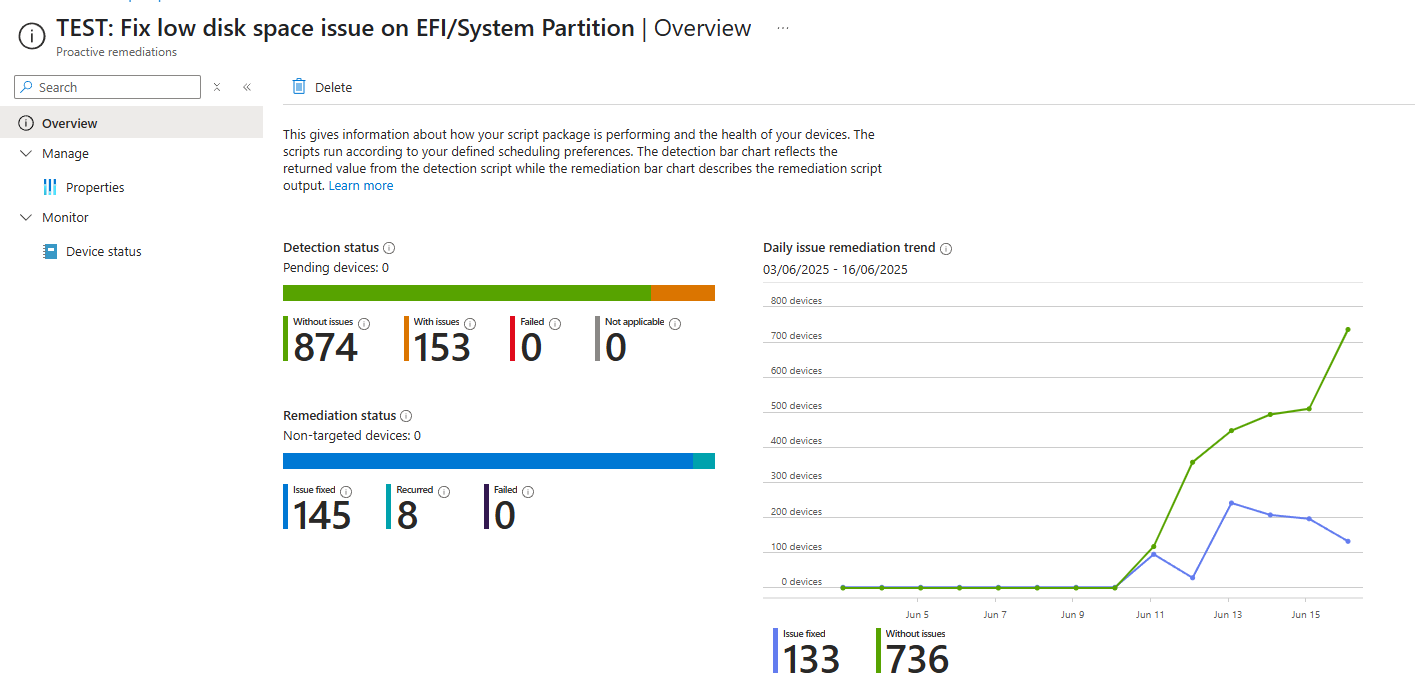
Test, test, and test again before rolling this out to production devices. A useful first step is to deploy the detection script only, so you can assess how widespread the issue is. Then create a separate remediation and roll it out in waves once you’re confident.
Given how many companies still rely on traditional OSD, it’s surprising there’s no official Microsoft documentation on modern partitioning schemes for Windows devices. The target seems to shift with every Windows 11 feature update. MDT and SCCM have been around forever, yet most guidance remains community-driven.
I developed these remediations while helping customers migrate away from SCCM and CapaInstaller. OEMs like HP and Dell are now far more generous with partition sizes—I’ve seen new Dell Pro devices with a 1.5GB ESP and 1GB recovery partition. If you’ve been using Autopilot for a while, you likely won’t encounter these issues. They usually arise when IT admins forget to update partitioning logic in their OSD tool of choice. OSD usually wipes and recreates partitions, so if your scheme is outdated, you’ll recreate the same problem every time.
If you’re still doing OSD the old-school way, I recommend a biannual or annual review of your task sequence to ensure the partitioning is still appropriate.
That’s all for now. I hope you find this useful—have a great day! 🙂
