Troubleshooting Windows feature update issues with SetupDiag
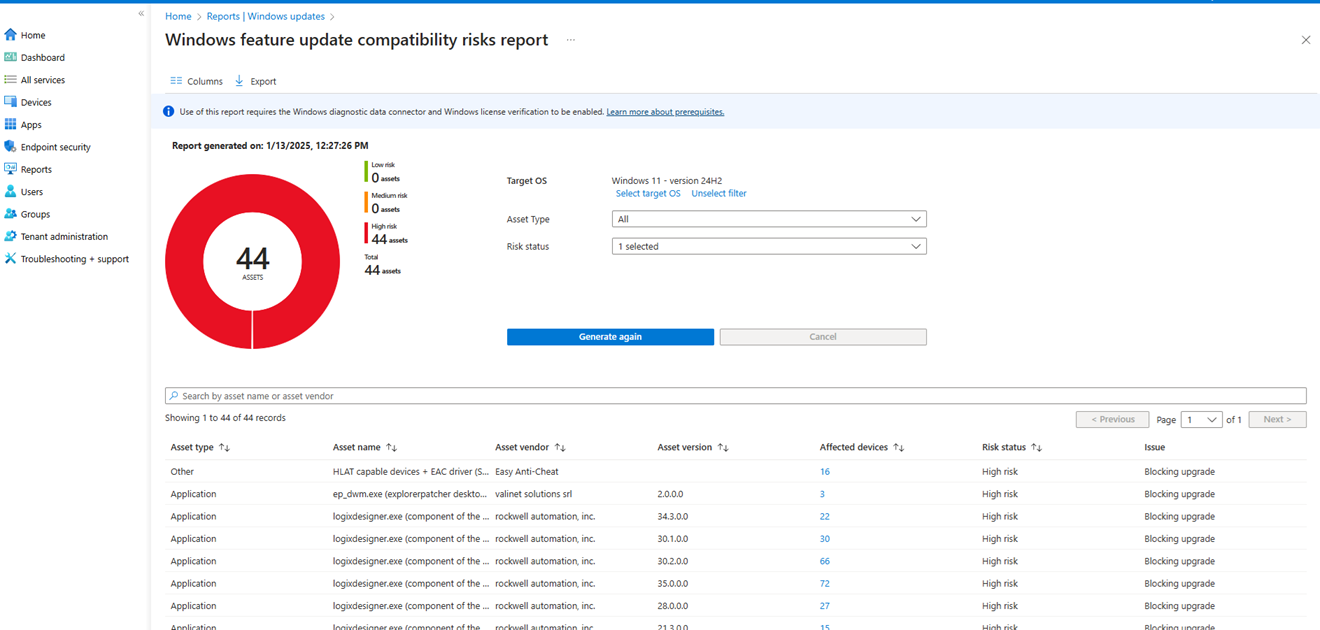
We have all been there. We deploy a feature update policy to deploy a feature update, and for weeks on end some devices are just stuck in “Offering…” in the reporting. Maybe it’s just slow to deploy the feature update, or the device is probably not used a lot? There can be plenty of reasons. In some instances, the reports in Intune can assist us to figure out why an update is not applying, like the “Windows Feature Update devices readiness report” and the “Windows Feature Update Compatibility Risks report”. Using those reports we can in some occasions pinpoint if a specific app or driver is blocking a specific feature update, like shown below.


But what happens when you have devices that is not featured in those reports and they are seemingly stuck on the “Offering” status for weeks on end in the update reporting? Well, something has probably gone wrong in regards to applying the feature update for whatever reasons. Maybe the feature update applied, and then a rollback triggered or perhaps the feature update didn’t apply at all and just errored out. In other words: As of this date, the reporting in intune currently only shows a very limited set of failures.
If you want to dive deeper into feature update failures, you can find the full set of log files from a failed or successful feature update under the folder C:\$Windows.~BT which is a hidden folder. However, manually sifting through those logs and correlating them can be very time consuming, and is a whole different can of worms. What can we do? SetupDiag to the rescue!

Using SetupDiag with On Demand remediations
Using setupdiag is super simple, but it requires admin rights. So normally this is something IT would carry out. But manually performing these steps by having to walk to the device can be very time consuming, and also difficult in multi-region companies, where admin rights might be locked down as well.
So I have written a basic PowerShell script that can be used as an On Demand remediation that can be triggered remotely from Intune to run the setupdiag tool, generate the setupdiag logs and then place them in a destination of your choosing. It can be locally on the devices (C:\windows\logs for instance) or it could be in blob storage, OnPrem FileShare or Azure Fileshare, the sky is the limit. The key thing is, to trigger the capture of the logs with SetupDiag. This can be very useful to remotely troubleshoot feature update issues without having to bother the end user.
Creating the remediation in Intune
You can use this sample code - Adjust the “$targetpath” variable based on your needs which is where the logs will be stored:
$setupdiaguri = 'https://go.microsoft.com/fwlink/?linkid=870142'
$targetpath = "C:\temp\FeatureUpdateIssues"
$setupdiag = "C:\temp\setupdiag.exe"
if (!(Test-path $targetpath)) {New-Item $targetpath -ItemType Directory}
Invoke-WebRequest $setupdiaguri -outfile $setupdiag

#Define SetupDiag Args
$setupdiagargs = "/Output:$targetpath\FeatureUpdate_Diagnostics-$env:computername.xml /Format:xml"

#Launch setupdiag with predefined arguments
Start-Process $setupdiag -Wait -Argumentlist $setupdiagargs
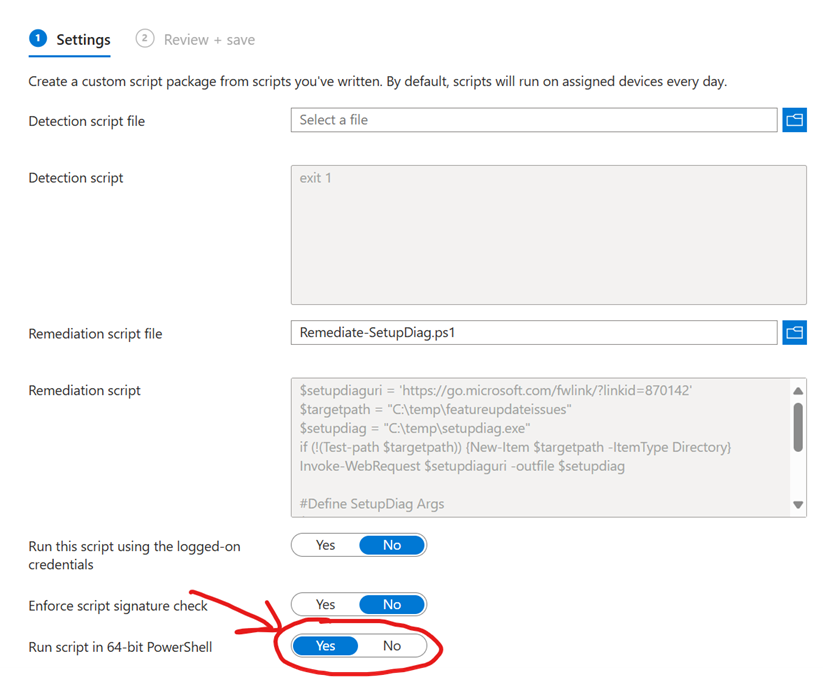
For the detection bit, since this script will be used as On Demand only, you can create a detection script with the code exit 1 to make sure the remediation triggers. When done, create your new remediation in Intune. Remember to set the “Run script in 64-bit powershell” to “Yes”. Then choose your scope tags, and do not assign the remediation to any groups, as it will be used on demand only.

Tip: You can utilize scope tags in an RBAC-model to hide/show select remediations to servicedesk personnel.
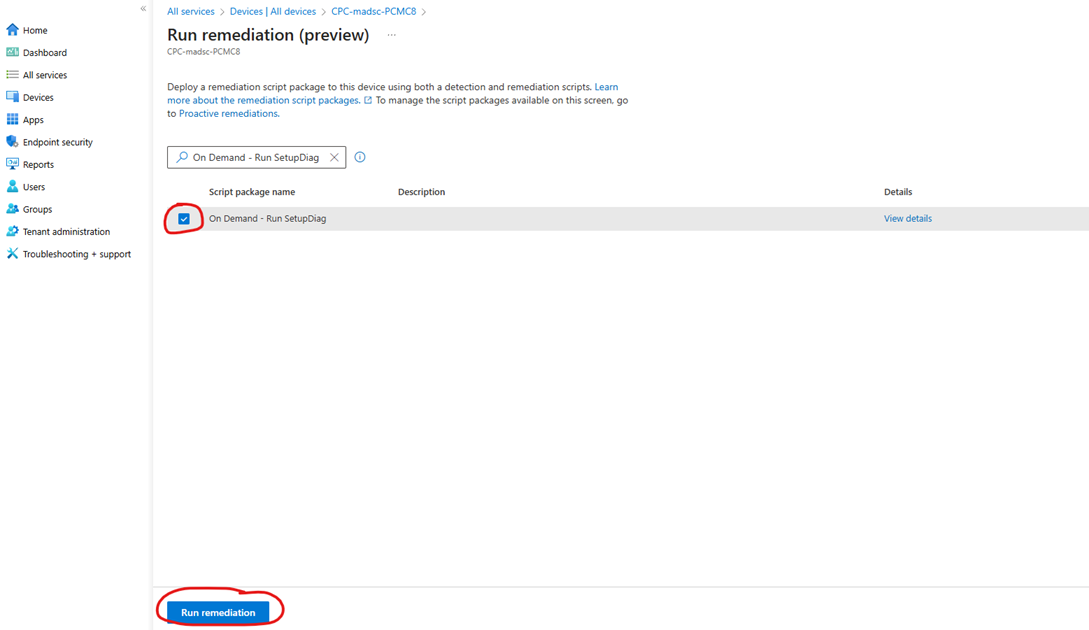
Once you have created the remediation, finally you can trigger it by going to your device in Intune -> Go to the 3 dots … -> Run Remediation (preview) -> Select the remediation you just created and finally click “Run remediation”


Shortly after running the remediation it should run setupdiag on the device and generate the logs as pr. the $targetpath variable that you have set.

Note: If no feature update logs is found by the tool, nothing will be output to the featureupdateissues folder
There is a lot of nuances to troubleshooting feature update failures, but if a any known signature of a known feature update failure is located by setupdiag, you will be able to clearly see it in the .xml file that it generates next to the Logs.zip file. Here are a simple real world examples from one of my customers which I have recently assisted:
 <LogErrorLine>2025-01-08 14:32:26, Error                 MOUPG  CSetupManager::ExecuteInstallMode(1096): Result = 0xC190020E</LogErrorLine>
  <FailureData>Warning: Found Disk Space Hard Block.</FailureData>
  <FailureData>Error: SetupDiag reports abrupt down-level failure.Last Operation: Error: 0xC190020E - 0x4001E</FailureData>
  <FailureData>LogEntry: 2025-01-08 14:32:26, Error                 MOUPG  CSetupManager::ExecuteInstallMode(1096): Result = 0xC190020E</FailureData>
  <FailureData>Refer to "https://docs.microsoft.com/en-us/windows/desktop/Debug/system-error-codes" for error information.</FailureData>
  <FailureDetails>DiskSpace = 20003, ErrorCode = 0xC190020E, ExCode = 0x4001E</FailureDetails>
  <Remediation>You must free up at least "20003" MB of space on the System Drive, and try again.</Remediation>
As we can clearly see, the feature update has failed due to lack of disk space. There’s plenty of reasons for a feature update to fail, suffice to say, setupdiag will make it easier for you troubleshoot these kind of issues. Using Remediations is just one way of triggering setupdiag, obviously there is always the option of doing it manually on the device from a command prompt with admin rights.
I hope you found this useful, have a super awesome day :)
