Fun with (ProActive) Remediations
ProActive Remediations or just Remediations, has been around for a while now, but even today when I visit customers, I still see a lack of awareness or basic understanding of them.
In this blog post, I will cover the basics regarding Remediations, so you can get started creating your own. If you are already savvy with PowerShell, you will find it’s super easy to get into. But fret not, if you are not good with PowerShell, you can often find assistance using CoPilot or googling to find some good remediations out there. I have written loads of Remediations over the years, and in the end of this post, I will share some of the ones that I’ve made for some inspirations as well.
Let’s dive into it! :)
Prerequisites
There are some PreReqs to using Remediations in Intune, I won’t list them all here, but basically you will need E3, E5 or A3 or A5 licenses in your tenant. You can find all the pre-reqs here. Be sure to review it, as it also includes some valuable best practices under the Script Requirements section in the docs.
Getting Started
When you create Remediations, you can’t copy/paste the code directly into the editor in Intune, you will need to have them as .ps1 files on your drive.
Let’s pretend you just want to check for a condition on your devices, without actually changing anything, and then have it report back if that condition is not met. Then you would just deploy a remediation with a detection script only, without a remediation script. Here is some simple code you can use to check if a folder exists, and if yes, return “With issue”:
if (Test-path C:\SWSetup) {Write-output "SWSetup folder has been located" ; exit 1}
    else {Write-output "SWSetup folder not located, everything is good"}
Note the “exit 1”. Anything that exits with an error code of 1 is considered as “With issues” so this is key to ensure the detection script returns the correct error code so Intune knows that device is “With Issue”. Also any message used with “Write-output” you will actually be able to see in Intune if we activate some extra columns.
Let’s save this script as a .ps1 and create a new remediation in Intune. Give it a nice name, and always make sure “Run in 64-bit context” is ticked. In this case we also don’t need to emulate the logged-on user so ensure that is disabled.
Deploy it to a test group and scope tag of your choice. Also note we can have this script run on a specific frequency, which is a major advantage remediations have over Platform scripts in Intune. Let’s just choose every hour while we are testing.
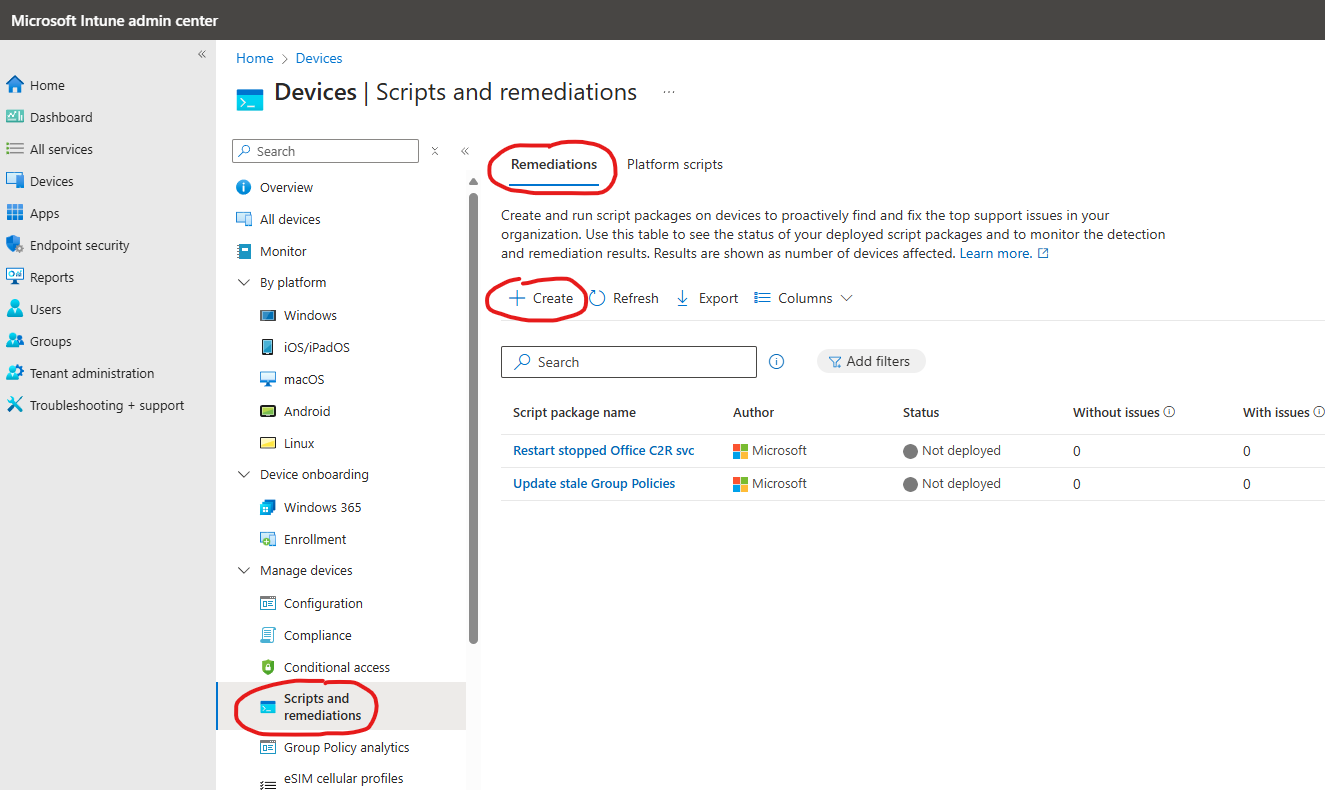
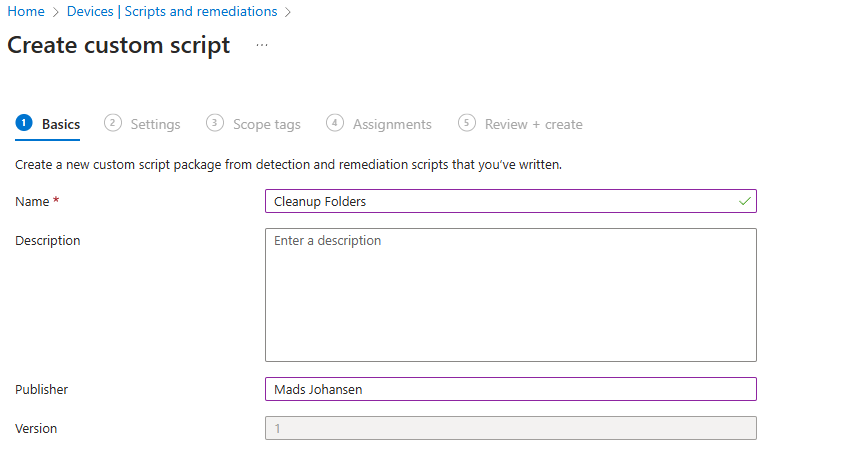
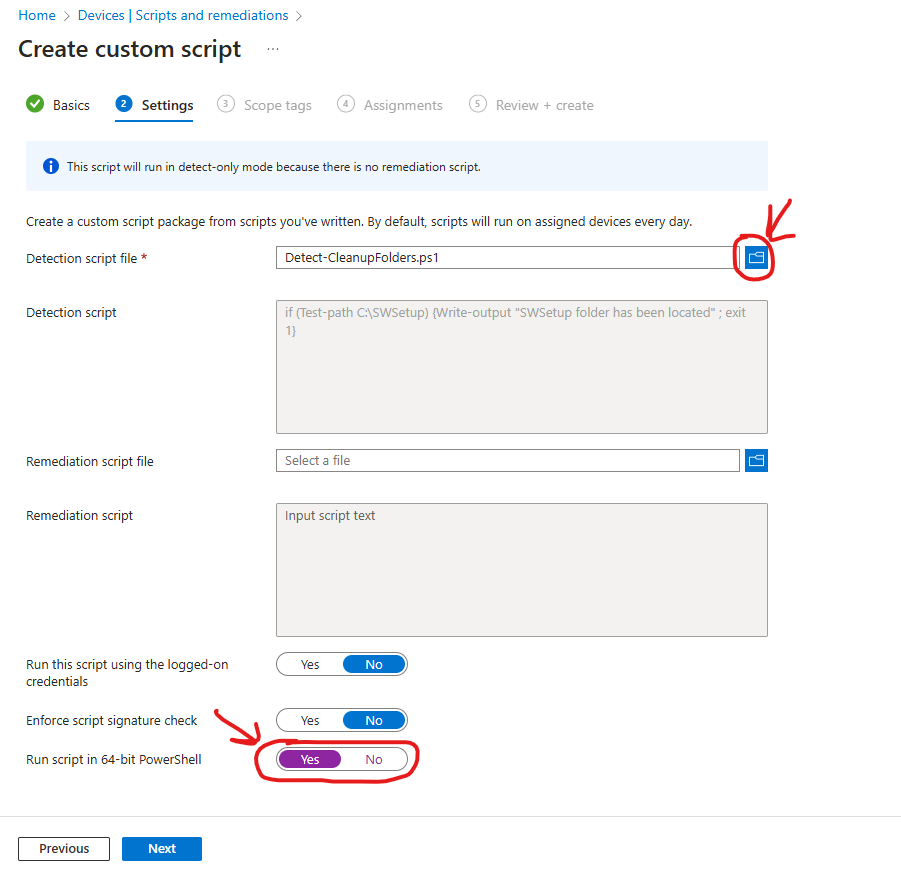
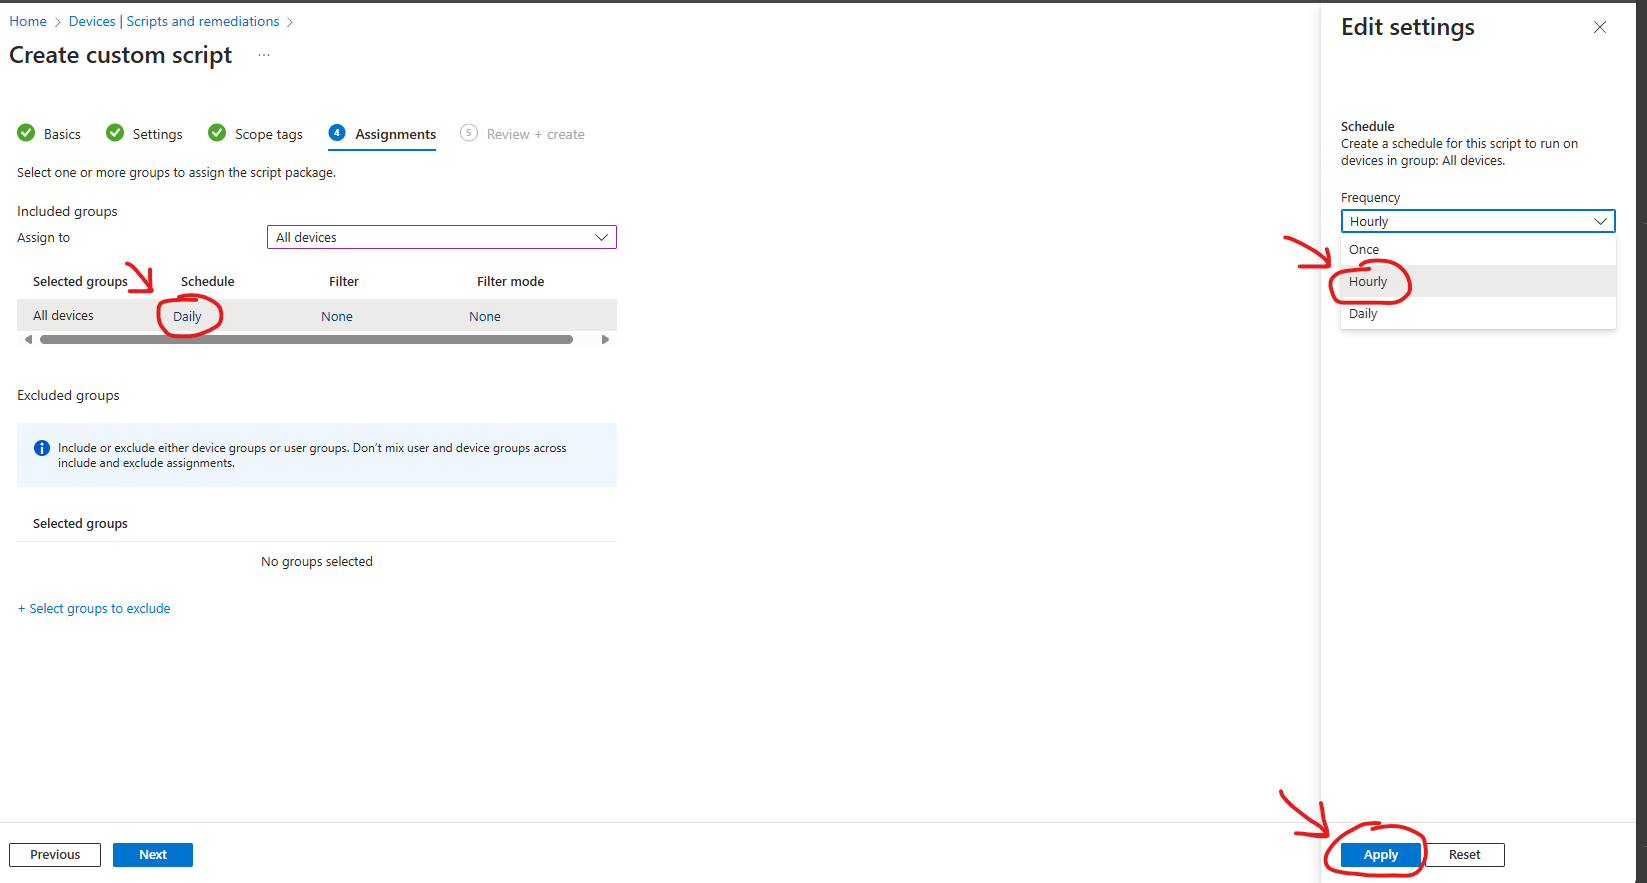
After a short while, if the folder C:\SWSetup exist on your devices, it should show up as “With Issue” in the remediation
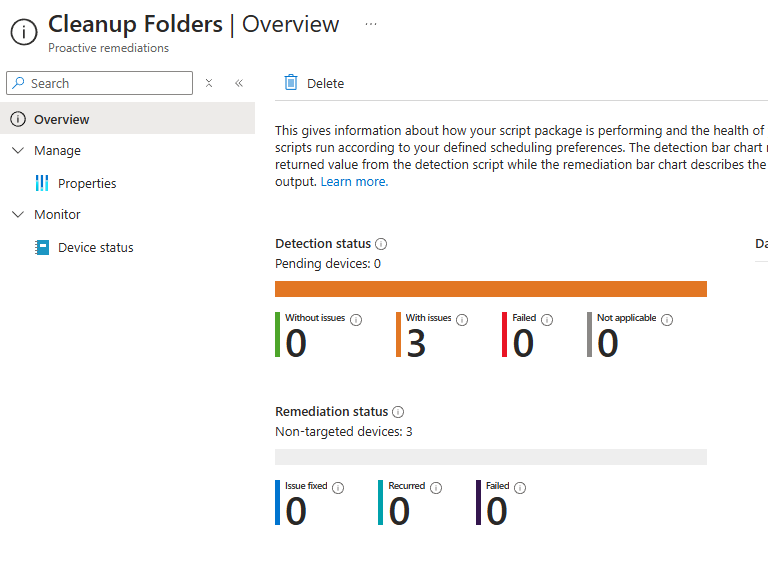
NOTE: The remediation report takes a while to update, as it stands today. If you press the “Device Status” in the left hand side, this view updates more rapidly.
Creating a remediation script
Let’s pretend you also want your remediation to actually fix the issue it’s detecting for. That’s also simple in this case. Let’s follow our example with the folder detection.
Let’s say we wanted to delete the folder to save disk space, then you can use the below code and add it as a remediation script. Save this script to a .ps1 file and activate the remediation as well.
if (Test-path C:\SWSetup) {Remove-Item C:\SWSetup -recurse -force}
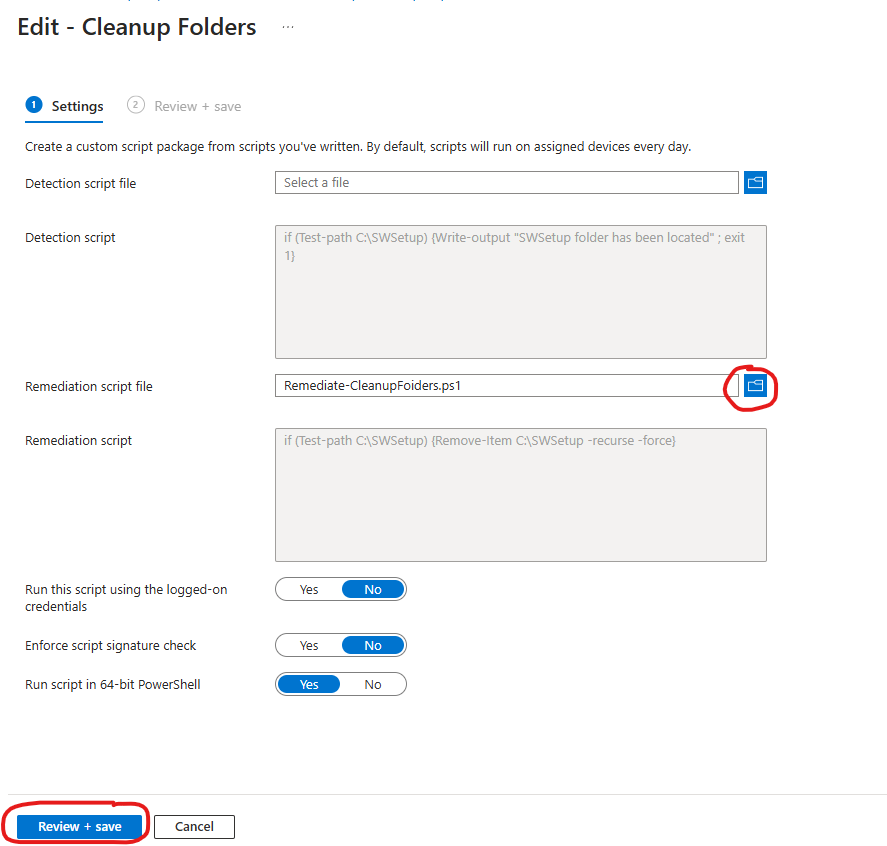
Now we just have to wait 1 hour to test it, right? Nah, Let’s just use the On-Demand Remediation feature, that makes things a bit easier :)
On Demand Remediations
If you dont want to wait for your remediation to trigger because of testing reasons or just for ad-hoc problem solving, Intune supports runnings Remediations on-demand. Go to any supported Windows device in Intune -> Press the elipses (3 dots) -> Run remediation on demand (preview)

You should now see all your remediations, including unassigned remediations, which you can run on-demand. Previously this was very slow to trigger, but this has since then been resolved so it’s now super fast. The device just needs to be turned on and online, and usually it triggers within 1-2 minutes after running the remediation.
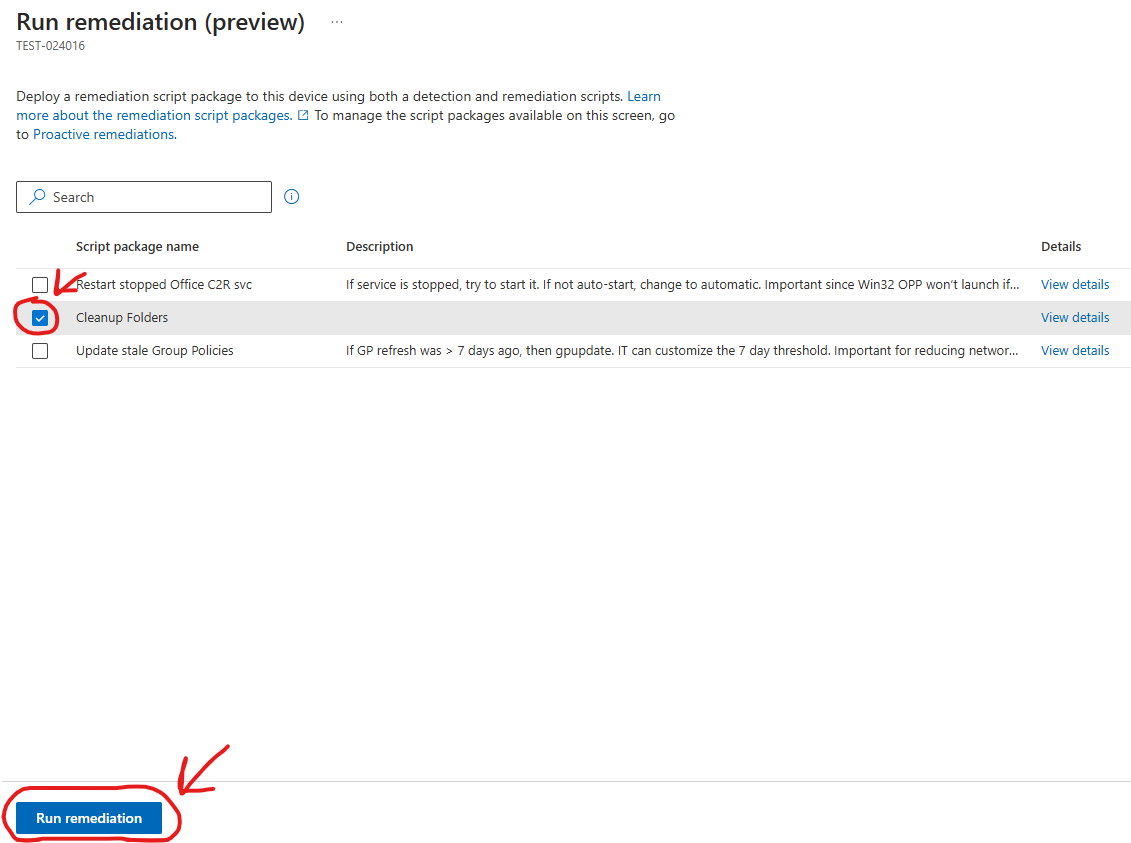
If you just want to utilize your remediation on-demand, then don’t assign it to any group, just leave it unassigned. It will still be visible under on-demand remediations. Let’s run the remediation again on demand so we can test our new remediation with the actual remediation script attached.
After you run it, you should eventually see your devices popping up under “issue fixed” in case the folder was found and deleted.
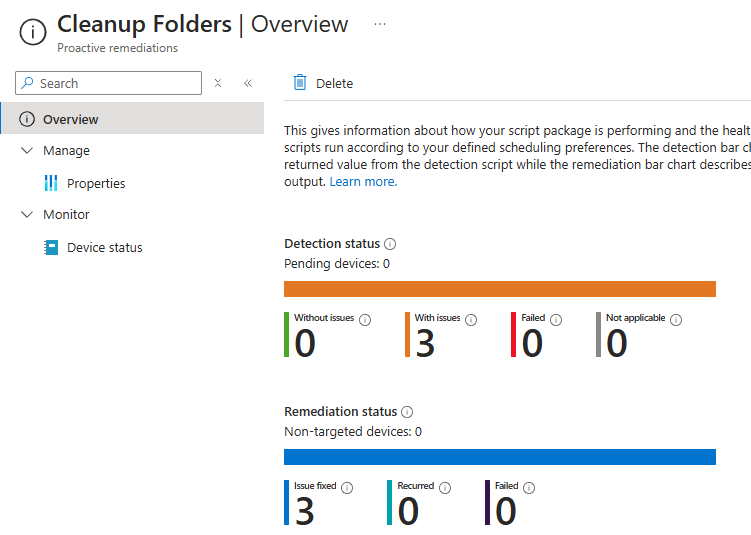 Remember this is based on your Detection script, so if the condition is no longer detected, it will assume the issue is fixed, based on your code.
Lastly, one last thing that is good to know is that you can actually view the output from your remediations if you add the extra columns under the device status overview. This is super useful if you want to print certain stuff to the console, i.e: Reboot Pending, Last Reboot time, device recently crashed with BSoD, lots of use cases. Simply select “Columns” and add all the pertinent columns which you want to see the output for.
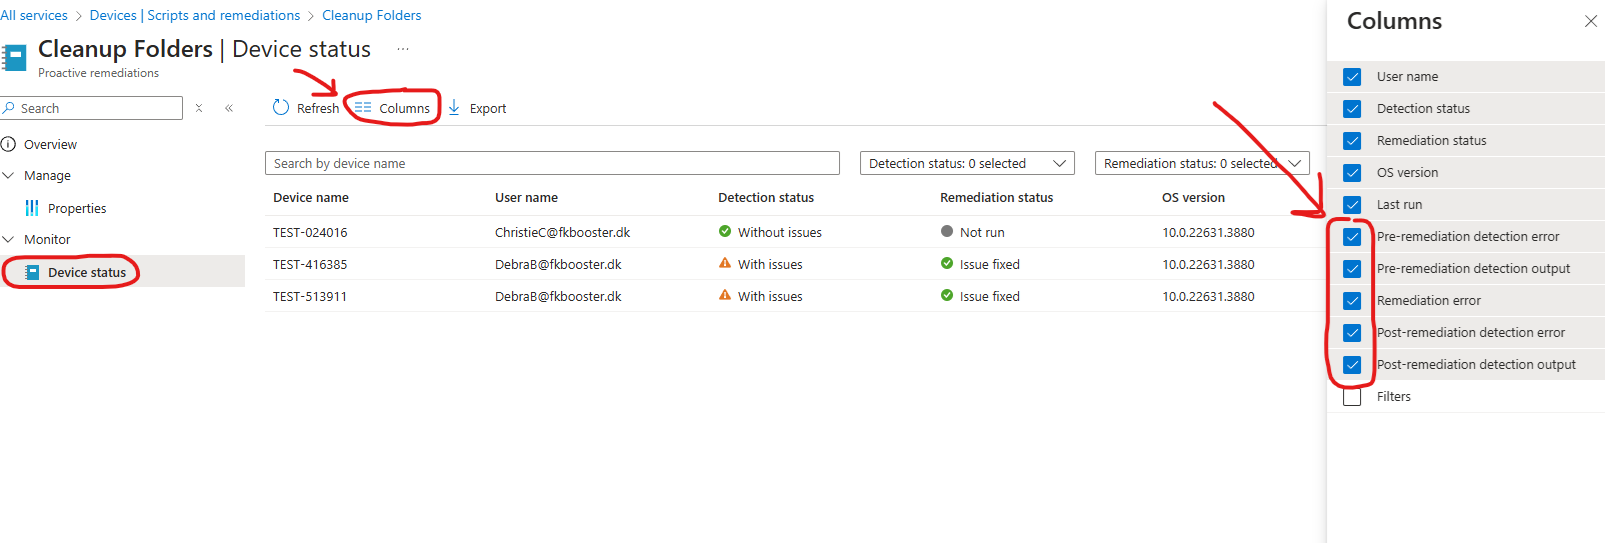

NOTE: For on demand remediations to work the device needs to be online and checking into intune. Proactive remediations like other device actions uses the WNS Service.
Wrapping up
I hope you found this useful, and it’s enough to get you started with remediations. The advantage remediations have over PowerShell (Platform scripts) in Intune is the following
- Run your scripts on a specific recurring schedule
- Usage of device filters when assigning to groups
- Use the “output” view in the remediation to print useful information to the Intune console
- Supports running on-demand remediations
Remediations uses the Intune Management Extension as well just like Platform (PowerShell) scripts does, from Intune.
Otherwise consider the possibility of the On Demand feature: Making remediations available for ServiceDesk personnel for ad-hoc problem solving. You can utilize scope tags and custom roles in Intune to only show select Remediations for ServiceDesk, in correlation with Custom Roles, when running them On Demand. This can be a great tool and time saver for them, rather than hopping on to the users device manually in a remote session.
If you want inspiration you can always check my github for remediations here - Some of them is pretty derpy and was created a long time ago, but I hope you find them useful to inspire you to get started to creating your own. :)
